- Categories
- Categories
- New & Hot Products
- Engine Swap Parts
- Categories / Engine Swap Parts
- Also in Engine Swap Parts
- Accessory Drive Brackets and Kits
- Exhaust Systems
- Gen III Hemi Swap Systems
- Mounts and Crossmembers
- Swap Accessories
- View All
- Marine and Powersports
- Categories / Marine and Powersports
- Also in Marine and Powersports
- Personal Watercraft
- Small Engine
- View All
- Air & Fuel Delivery
- Categories / Air & Fuel Delivery
- Also in Air & Fuel Delivery
- Air Cleaners
- Air Scoops
- Cold Air Intake
- Fuel System Kits
- Fuel Tanks and Fuel Cells
- HydraMat
- View All
- Exhaust
- Nitrous
- Categories / Nitrous
- Also in Nitrous
- Bottles and Accessories
- Controllers and Accessories
- Direct Port Systems
- Distribution Blocks, Filters, Adapters and Fittings
- Electrical and Wiring
- Fuel Pumps and Regulators
- Gauges
- Hose Lines and Tubing
- Intercooler Sprayers
- Microswitch and Solenoid Mounting Brackets
- NOS Jets
- Nitrous Blowdown Hoses and Tubes
- Nitrous Plates
- Nozzles
- Purge Kits
- Refill Kits and Components
- Solenoids and Solenoid Service Parts
- Tools
- View All
- Apparel & Collectibles
- Categories / Apparel & Collectibles
- Also in Apparel & Collectibles
- Backpacks
- Banners
- Clocks
- Decals
- Diecast
- Drinkware
- Face Masks & Gaiters
- Headwear
- Hitch Cover
- Hoodies
- Jackets
- Ladies Apparel
- Literature
- Metal Signs
- Misc
- Pet Accessories
- Polo Shirts
- Shop Shirt
- Sunglasses
- Tote Bags
- Youth Apparel
- View All
- Exterior
- Categories / Exterior
- Also in Exterior
- Convertible Tops and Components
- Decklid Panels
- Doors
- Fenders
- Firewall, Cowl, and Front Unibody
- Floor Pan and Frame
- Fuel Doors
- Graphic Kits
- Grilles
- Hood
- Lighting
- Mini Tub Kits
- Plate Frames and Accessories
- Quarter Panels
- Radiator Supports
- Rear Spoilers
- Rocker Panel
- Roof Panel
- Trim and Moldings
- Truck Bed & Parts
- Truck Cab & Parts
- Valances
- Weatherstrip
- Window and Windshield
- View All
- Off-Road
- AC and Heating
- Categories / AC and Heating
- Also in AC and Heating
- Controls and Cables
- Filler and Delete Panels
- Heater Box and Hoses
- Heater Core
- View All
- EV Conversions
- Categories / EV Conversions
- Also in EV Conversions
- Conversion Brackets and Accessories
- Displays
- High Voltage Contactors
- High Voltage Disconnects
- Power Distribution (PDU)
- Sensors, Connectors, and Accessories
- Vehicle Controls (VCU)
- Wiring Harnesses
- View All
- Plumbing AN Fittings and Hose
- Categories / Plumbing AN Fittings and Hose
- Also in Plumbing AN Fittings and Hose
- Adapters
- All Hose Groups
- Application Specific Parts
- Catch Tanks
- Fuel System Components
- Hose Ends
- Hose Protection, Sleeving & Clamps
- Mr Gasket Push-On
- Mr Gasket Swivel
- Oil & Cooling Systems
- Plumbing Tools
- Power Steering
- Premade Hoses
- Seals
- Super Stock
- Ultra Flex
- UltraPro
- Valves
- Weld-ons and Fill Caps
- View All
- Brakes
- Fasteners and Hardware
- Categories / Fasteners and Hardware
- Also in Fasteners and Hardware
- Quarter Turn Fasteners
- Safety Wire
- Transmission and Drivetrain
- Wheel and Tire
- View All
- Restoration
- Categories / Restoration
- Also in Restoration
- Air Conditioning and Heating
- Air and Fuel Delivery
- Books, Manuals & Brochures
- Brakes
- Bumper
- Convertible Tops and Components
- Cooling
- Decals Labels & Tags
- Electrical
- Engine & Transmission Mounting
- Exhaust
- Fender Covers
- Fuel Tanks & Components
- Ignition
- Lamps & Lighting
- Longbed to Shortbed Conversion Kits
- Radios & Stereos
- Suspension & Steering
- Trailer Hitches
- Transmission & Drivetrain
- Weatherstrip & Rubber
- Wheels & Accessories
- Windows & Windshield
- Wood Bed Floor and Trim
- View All
- Carburetors
- Gaskets
- Safety Equipment
- Categories / Safety Equipment
- Also in Safety Equipment
- Aprons
- Arm Restraints
- Chest and Rib Protectors
- Cleaners
- Drag Parachutes
- Equipment Bags
- Head and Neck Restraints
- Seats
- Shifter Boots
- Shoes
- Tow Straps
- Undergarments
- Window Nets
- Youth
- View All
- Cataclean
- Categories / Cataclean
- Gauges and Gauge Accessories
- Categories / Gauges and Gauge Accessories
- Also in Gauges and Gauge Accessories
- Gauge Accessories and Harnesses
- Gauge Adapters and Fittings
- Shift Lights
- Tach Adapters
- View All
- Suspension & Chassis
- Categories / Suspension & Chassis
- Also in Suspension & Chassis
- Air Ride
- Body Mounts and Hardware
- C-Notch Kits
- Driveshaft Safety Loops
- Front Drop Axles & Kingpins
- Hitches and Towing
- Leveling and Lift Kits
- Longbed to Shortbed Conversion Kits
- Roll Cage Kits
- Shocks and Struts
- Springs & Bumpstops
- Strut Tower and Chassis Braces
- Sway Bars and Components
- Traction Bars and Components
- View All
- Cooling
- Ignition
- Tools, Shop Equipment & Chemicals
- Categories / Tools, Shop Equipment & Chemicals
- Also in Tools, Shop Equipment & Chemicals
- Diagnostic Tools
- Engine Tools
- Extra Long Fender Covers
- Fender Covers
- Fluid Tools
- Front End Covers
- Hand Tools
- Jumbo Fender Covers
- Oils, Fluids, & Additives
- Paint & Dye
- Shop Tools
- Trailer Tools
- View All
- Data Acquisition
- Categories / Data Acquisition
- Also in Data Acquisition
- Cables
- Modules
- Power Distribution Modules
- Sensors
- Sensors With Modules
- Wiring Accessories
- View All
- Intake Manifolds
- Categories / Intake Manifolds
- Carbureted Intake Manifolds
- Carburetor and Manifold Combos
- EFI Intake Manifolds
- Installation Parts and Accessories
Also in Intake Manifolds- Roots Supercharger Intake Manifolds
- View All
- Transmission & Drivetrain
- Categories / Transmission & Drivetrain
- Also in Transmission & Drivetrain
- Internal Components
- Rear Axle & Differential
- Transmission Controller
- Transmission Coolers
- Transmission Mounts
- Transmission Pans and Dipsticks
- Transmission Swap Parts
- Transmissions
- View All
- EFI - Fuel Injection
- Categories / EFI - Fuel Injection
- Also in EFI - Fuel Injection
- AEM EFI
- Atomic EFI
- EFI Distributors
- EFI Fuel System Components
- Gauges and Displays
- Harnesses
- Hilborn EFI and MFI Systems
- Hilborn Service Components
- Injectors
- Legacy EFI
- Modules and Sensors
- Terminator EFI
- Throttle Bodies
- Wiring Shop
- View All
- Interior
- Tuners and Programmers
- Categories / Tuners and Programmers
- Also in Tuners and Programmers
- Accessories
- Amp'd Throttle Booster
- Dinan Software-Tuning
- Inline Tuning Modules
- PCM
- View All
- Electrical
- Lighting
- Categories / Lighting
- Also in Lighting
- Bezels and Trim
- LED Light Bars
- LED Work Lights
- Marker and Signal Lamps
- Tail Lights
- View All
- Wheels and Wheel Accessories
- Categories / Wheels and Wheel Accessories
- Engine
- LS Power
- Categories / LS Power
- Also in LS Power
- EFI Components
- Engine and Transmission mounts
- Fuel Pump Regulator and Filter
- Fuel Tanks
- LS Accessory Drive Brackets and Kits
- LS Drivetrain
- LS Engine Components
- LS Gaskets
- LS Ignition Products
- LS Swap Oil Pans
- LS Swap Radiators
- LS Throttle Bodies
- LS Tools
- LS Valve Covers & Engine Appearance
- LS and LT Nitrous Systems
- View All
-
- Brands
- Brands
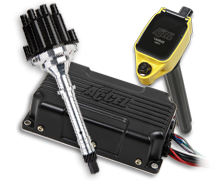
- ACCEL
- DiabloSport
- Holley RetroBright
- REKUDO
- ADS
- Dinan
- Hooker
- REV Wheels
- AEM
- Drake Muscle Cars
- Hooker BlackHeart
- Rocket Racing Wheels
- AEM EV
- Earl's
- Hurst
- Scott Drake
- Amp'd
- Edge
- Lakewood
- Simpson Motorcycle
- Anvil Off-Road
- Fender Gripper
- Legendary Wheels
- Simpson Racing
- APR
- Flowmaster
- Mallory
- Sniper
- B&M
- Flowmonster
- Mr. Gasket
- SPAL Fans
- Baer Brakes
- Flowtech Exhaust
- MSD
- Speartech
- Brawler
- Frostbite Cooling
- NOS
- Stilo
- Bright Earth
- Garrett Turbochargers
- ProConnect
- Street Fire
- Brothers Trucks
- Halibrand
- Proforged
- Superchips
- Carroll Shelby Wheels
- HANS
- Pulsar
- Weiand
- CataClean
- Hays
- Quick Fuel Technology
- White Box
- Classic Instruments
- Hilborn
- Quick Time
- XDR
- Demon
- HK Wheels
- Racepak
-
- Detroit Speed
- Holley
- RaceQuip
-
- DeWitts
- Holley EFI
- Range Technology
-
- Shop By Vehicle
- Shop By Vehicle
- Deals
Tech Support
- Home /
- Support


| Tech Support Line | Phone Number |
|---|---|
| Holley | 1-866-464-6553 |
| AEM | 1-310-484-2322 |
| APR | 1-800-680-7921 |
| Baer Brakes | 1-602-233-1411 |
| Brothers Trucks | 1-800-977-2767 |
| Classic Instruments | 1-844-342-8437 |
| Detroit Speed | 1-704-662-3272 |
| DiabloSport | 1-866-404-6141 |
| Dinan | 1-800-341-5480 |
| Edge Products | 1-888-360-3343 |
| GearFX | 1-704-799-0955 |
| MSD | 1-866-464-6553 |
| Racequip | 1-813-642-6644 |
| Range Technology | 1-866-404-6141 |
| Simpson Race Products | 1-800-654-7223 |
| Superchips | 1-888-227-2447 |
| Scott Drake | 1-800-977-2767 |
| RetroBright | 1-800-977-2767 |
| Bright Earth | 1-800-977-2767 |
| Proforged | 1-800-977-2767 |
| All Wheel Brands | 1-800-977-2767 |
| Stilo | 1-800-654-7223 |
HOLLEY TRAINING EVENTS

Holley hosts a number of training events for Holley's EFI systems and Carburetors.
Learn More HereFind Speedshops Near You
FAQ's
- My vehicle has a stumble from a dead stop. What can I do to cure this?The most common cause of a stumble is not having an adequate accelerator pump shot. The first thing to do is to look at the discharge nozzle and make sure you are getting a good strong pump shot. If not then you need to inspect the pump diaphragm for a hole or tear. You will also need to make sure that the pump passage is clear from any trash or debris. First you will need to check the adjustment on the pump. To do this you will open the throttle all the way (WOT). Push the pump arm lever down and then adjust the pump override spring to obtain .015" clearance between the pump arm and lever. If you are having a stumble and no black smoke out the tailpipe then you will need to increase the shooter size. If it stumbles and you are getting black smoke from the tailpipe then it will be necessary to decrease the shooter size.Helpful?
- I can rev the engine when it is in park and the secondaries will not open. Why is this?The secondaries will not open by free revving the engine. The engine needs to be under a load before they will open. If you are still uncertain if they are opening or not you can take a normal paperclip and clip it onto the secondary diaphragm rod. You will then push it up against the bottom of the secondary diaphragm housing, now you will need to go out and drive the vehicle. When you return you will be able to look at the position of the paperclip on the rod. If it is lower on the rod then you can tell the secondaries opened and how far they opened. This is useful in determining if you need a heavier or lighter secondary spring.Helpful?
- How do I adjust the fuel level on my carburetor?Setting the fuel level should be the first thing you do before attempting to make any further adjustments.The float level should put the fuel level just below the bottom of sight plug hole. You will make the adjustment with the vehicle on a level surface and the engine idling. You will first remove the sight plug, then to make your adjustment you will need to loosen the lock screw on the needle and seat. This will allow you to turn the adjusting nut to raise or lower the float level. Each hex flat on the nut will change the float level approximately 1/32". When you have the fuel level just below sight plug hole you will then tighten the lock screw and reinstall the sight hole plug. Make sure you have a shop towel handy in case you have any fuel leaks from the Sight plug or needle and seat adjusting nut.Helpful?
- I have a vacuum secondary carburetor that bogs when the secondaries come in. What will cause this?Bogging and hesitation are caused by the secondaries coming in too quickly. You can install a heavier secondary spring and this will prevent the secondary from coming in too soon. If the engine is sluggish in response at full throttle then the secondaries may not be opening soon enough. You will then need to go to a lighter spring. The spring kit is part number 20-13 which will have 7 different springs to fine tune with.Helpful?
- After I shut my car off and come back out the next morning there is gas on the throttle shaft and puddled on the intake. What causes this?This is usually caused by percolation. This is when the engine is shut off and the engine temperature rises it causes the fuel to boil in the bowl and leak out of the boosters. There are a couple of things you can do to cure this one is make sure the fuel level is not too high. You can also lower the fuel level about 1/8" below the sight plug hole and this will cure it sometimes. The heat from the engine will rise into the carburetor sometimes and will cause the fuel to boil. Installing a phenolic heat spacer between the carburetor and the intake or a heat shield can cure this. These parts will prevent heat from getting to the carburetor and boiling the fuel.Helpful?
- How do I find the "list" number on my carburetor?The list number for most performance and factory 2 and 4 barrel carburetors will be found stamped into the upper right hand corner of the airhorn or sometimes called the choke tower. On the 4150 HP models that do not have a choke tower the list number will be stamped into the mainbody behind the throttle linkage. This number is used to identify the carburetor and also used when needing service parts or renew kits.Helpful?
- How do I know if a vacuum or mechanical carburetor is best for me?For street cars the vacuum secondary carburetor works best on midweight or heavyweight cars with an automatic transmission. They are more forgiving than a Double Pumper is because they work by sensing engine load. The mechanical secondary carburetor is best on a lighter car with radical camshaft and a lower gear and manual transmission or on a car that is going to be used for racing purposes. Here are some additional resources for you to see on Holley TV. Overview Of 4150 Vacuum Secondary Carbs Click Here To View. Overview of 4150 Mechanical Secondary Carbs Click Here To View.Helpful?
- I just bought a new carburetor and it has a warning that it will not work with an automatic overdrive transmission. What can I do about this?This warning was placed with the carburetor because if not installed properly with the correct transmission kickdown bracket for the GM 700R4 it will result in premature transmission failure. Part #20-95 and the kickdown mounting stud part #20-40 will allow the proper adjustment of the cable.Helpful?

 Get help from other Gear Heads!

Product Registration
Extend your Warranty!
Extend your Warranty!

Warranties

Ask Our Experts!
1-866-464-6553
1-866-464-6553

Email A Technician
Back To Top